It’s easy to record an UpStage performance using screen recording software, however there are many different settings that you can adjust in order to get the best result. When several people are recording performances during the festival, we try to have everyone’s recordings as similar as possible in format and size in order to be able to easily edit together excerpts for the showreels.
It is possible for anyone watching a performance to record it. If you are doing this, please let us know. You should make a copy of the recording available to the artists (it is their performance, after all) and we would also appreciate a copy for our archive.
Screen recording software options:
- Screensnapz Pro – mac only; lots of options in the settings (see below); no ads; shareware.
- Camtasia – windows only; lots of options in the settings (see below); no ads; shareware.
- iShowU – mac only; not free, don’t know much about it yet.
- BB FlashBack Express – windows only; generates an .fbr file, which can be converted into flash or avi file; no ads; have had some audio problems with it.
- Camstudio: this is a free, open source and less processor-intensive alternative to Camtasia, however we have encountered problems with it because the audio & video are recorded at different frame rates which causes it to get out of sync, & correcting it can lead to other problems such as reduced quality of the web cam images. There is a Camstudio video tutorial here that addresses the syncing issue.
Tips for good recordings:
Before you start recording, check that:
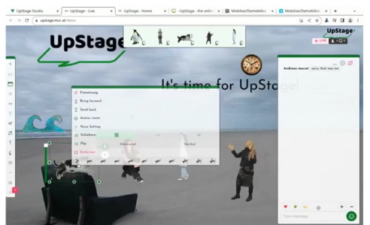
- your browser is showing Audience mode (only chat on the right, no player tools) and that all other browser tabs are closed;
- audio on computer is ON;
- whatever recording software you use is on the movie setting, not still image.
Settings for your recording software:
- 25 frames per sec (if you can – we need 25fps in order to be able to edit excerpts from the recordings together in a showreel)
- browser window is as big as you can on your screen
- when saving the movie:
for Mac : codec (compressor) H.264, file type .mov, sound 48KhZ (as best quality as you can)
For Windows and Linux: if you have choice of type of files, we much prefer NOT to have .avi files and definitely not DivX
NOTE: you can always recompress the file afterwards if you are emailing it or putting it online; for documentation purposes it’s always good to have the highest possible quality.
SnapzPro Settings
Before recording, you have the choice of 4 options; select “movie” on the right, then these settings:
- Movie settings window:
Selection style: normal (you must set the frame yourself, otherwise might record only part of the screen) - Camera mode: fixed camera
- Frame rate: 25
- Scale: 100%
- Mac audio track: ticked
- Cursor visible: unticked
Then bottom left corner, there is a pop-down arrow, click it and:
- Use movie guides: ticked
- Color change: NONE
- Smoother (more CPU intensive) video capture: ticked
AFTER recording, a dialogue box opens with the movie saving settings:
- Tick include video track – summary of settings underneath and buttons to change the settings as follows:
- Compression type: H.264
- Motion frames per second: 25
- Key frame: unticked
- Encoding Mode: single pass
- Compressor: slider at the very right on BEST
Then, click OK and you see a summary of the video track including Compressor: H.264 and Settings: high quality, millions of colours.
- Tick include audio track and enter the following settings if necessary:
- compressor: None
- Rate: 48.00kHz
- Size: tick 16 bit or more (more is better: 24 or 32 bit – but like the frame rate, it will mean the file takes longer to save)
- Stereo: tick
Click OK; you will see a summary of the audio track including Compressor: none, Settings: 48.000kHz, stereo, 16 bit (or more)
With these settings, the recording of a 20-minute performance will be about 7GB.
Camtasia settings
To record at 25 fps, you need to set the “screen capture frame rate” (Tools > Options > Inputs) in the screenrecorder window the video.
You also need to ensure that you are recording ONLY your computer audio, NOT a microphone channel that will record the ambient noises in the room.
Camtasia generates a (huge) .camrec file that can then be exported to .mov (make sure you have the latest version of Quicktime installed, as you will need this codec for exporting).
To export a .camrec file as a .mov file:
- add clip on timeline
- choose 1280 x 768 (Recording Dimensions)
- click on “Produce and Share”
- from the “Production Wizard” choose “Add/Edit Preset …”
- from “Manage Production Presets” click on “New …”
- from the next “Production Preset Wizard – Edit a Production Preset”
- from file format choose “MOV – Quicktime Movie”
- from the next “Production Preset Wizard – Quicktime Encoding Options”; don’t change anything here
- from the next “Production Preset Wizard – Video Size” choose “Editing Dimensions Video Size”
- from the next “Production Preset Wizard – Video Options” don’t change anything
Now you have a preset you can use to export in .mov.
Audio out of sync?
There is a bug within Camstudio which may cause the audio to be out of sync with the video. Camstudio records the image at 200 fps, but audio is recorded at about 208 fps. It is possible to fix this using virtual dub to adjust both to the same framerate. After doing this, recompress it and set the framerate to 25 fps (which is sufficient and gives a better result, as 200 fps causes lots of framedrops). Your final file size will be much smaller and more manageable.
Tips:
- Uninstall softwares you do not need (at least, not in the next few days), defragment the disk, delete old, useless files
- The Camtasia “editor” can slow the whole system, so, when you will record, do not keep it open, but just the “recorder tool”.
- Close ManyCam, it may affect your recordings.
- Adjust the screen recording in relation to the platform. Do not record the full screen.

